

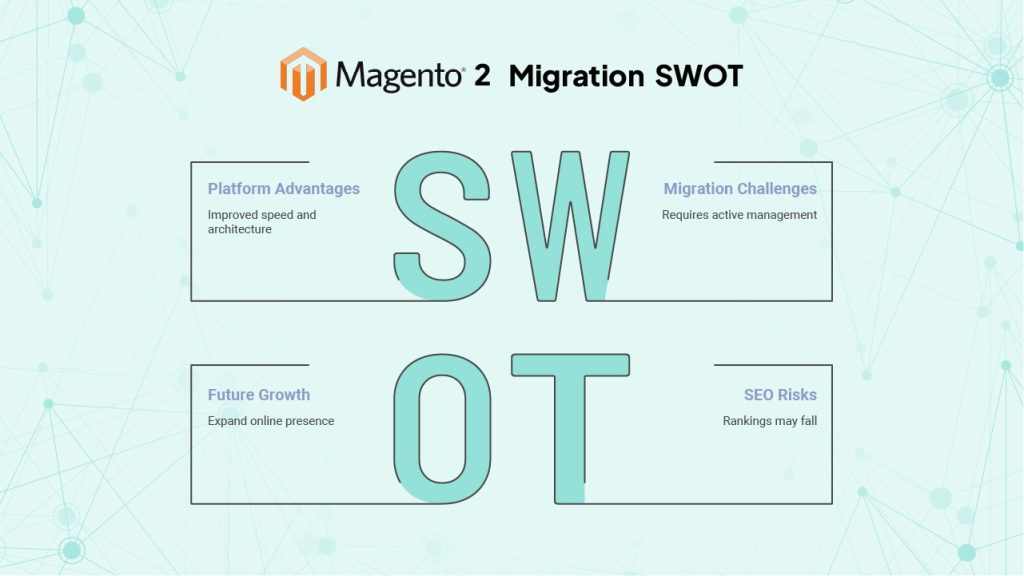
When Magento 1 reached its end of life, many merchants found themselves stuck between the comfort of an old system and the need to move to something modern. Magento 2, now strengthened and refined under Adobe Commerce, offers better performance, cleaner architecture, and far more room to scale. But, migration from Magento 1 comes with one huge concern: SEO loss.
The migration from Magento 1 to Magento 2 itself is not the scary part. Plenty of agencies can move your data from one platform to another. What’s actually terrifying is logging into Google Analytics two weeks after launch and seeing your traffic cut in half.
Or watching your product pages that used to rank on page one suddenly disappear from search results entirely. Or realizing that three years of content marketing and link building just evaporated because someone forgot to map your blog URLs correctly.
Which is why, in today’s blog post, we have decided to walk you through the migration process in a very simple way so you understand what happens during migration and how to make sure that Google continues to treat your store the way it always has.
Why Your SEO is Actually at Risk
Most migration guides jump straight into technical steps. That’s backwards. Before you touch anything, you need to understand what matters about your current site from Google’s perspective.
Your store has been live for years. In that time, Google has crawled it thousands of times. It knows your URL structure, your site hierarchy, which pages link to which other pages, how fast your pages load, what your title tags say, how your schema markup is structured. Every indexed page is a small asset. Every backlink pointing to your site is a vote of confidence. Your domain authority didn’t appear overnight.
When you migrate, Google sees it as a completely new site until you prove otherwise. The URLs change. The HTML structure changes. The page load time changes. The internal linking structure probably changes.
If you don’t explicitly tell Google “this new page is the same as that old page,” it starts from zero. Your old pages drop out of the index. Your new pages sit in the sandbox for months while Google decides whether to trust them.
The whole point of SEO-conscious migration is continuity. You want Google to understand that your store moved houses but it’s still the same store. Same products, same content, same authority, just a new technical foundation.
The Step-by-Step Migration Process
Here’s the actual sequence we follow at BrandCrock wählen for every migration.
Step 1: Run a Complete Pre-Migration Audit
This part is tedious. Do it anyway.
You need to crawl your entire Magento 1 site and export every single URL. Use Screaming Frog, Sitebulb, or any crawler that can handle your store’s size. Let it run completely. Don’t skip pages or limit the crawl depth. You want everything: products, categories, CMS pages, blog posts, weird old landing pages you forgot existed.
Export that crawl data to a spreadsheet. You now have a complete map of your current site. This becomes your master reference document.
Next, go into Google Search Console and export your performance data. Download the pages report showing which URLs actually get impressions and clicks. Some pages in your site crawl have never been indexed. Some indexed pages never get traffic. You don’t need to obsess over those. But the pages that do get traffic? Those are your priorities.
Now look at your backlinks. Pull the full list from Ahrefs or whatever tool you use. Sort by referring domains. You’ll probably find that 80% of your backlink value points to 20% of your pages. Those pages are critical. The URLs for those specific pages cannot break during migration. If a high-authority site links to your ultimate guide blog post from 2019, that URL needs to work after migration or you need a redirect in place before you launch.
The reason people skip this audit is because it takes time and feels like busywork. But this is where migration disasters start. You can’t protect URLs you don’t know exist. You can’t redirect traffic from pages you forgot about. Do the audit.
Step 2: Make URL Structure Decisions Early
Magento 2 handles URLs differently than Magento 1. You need to make a decision early: are you keeping your exact URL structure, or are you improving it during migration?
There’s no universally right answer. Keeping the same structure is safer and simpler. If your product URLs currently include the full category path, you can maintain that in Magento 2. If your URLs are flat without category paths, you can keep them flat. Same structure means fewer redirects, less room for error, and faster implementation.
Improving your structure during migration makes sense if your current URLs are genuinely problematic. Maybe they’re too long, maybe they include weird parameters, maybe your hierarchy is a mess. Cleaning that up during migration kills two birds with one stone. But it adds complexity. Every changed URL needs a redirect. Your internal linking needs rebuilding. Your risk goes up.
We typically recommend keeping the structure unless there’s a compelling reason to change it. Your SEO isn’t stuck because of URL structure. It’s probably stuck for other reasons. Don’t create unnecessary redirect chains just to have “cleaner” URLs.
Once you decide, document it clearly. Your development team needs to configure Magento 2 to match whatever structure you chose. That configuration happens in Stores > Configuration > Catalog > Search Engine Optimization. Set your product and category URL format there. Test it on a single product before you migrate everything.
Step 3: Configure Magento 2 for SEO Before Data Migration
Your Magento 2 environment needs correct SEO configuration before any data touches it. Fixing configuration after migration means reindexing, cache clearing, and potentially regenerating URLs. Do it right the first time.
Start with basic URL settings. Go to Stores > Configuration > Web. Enable “Use Web Server Rewrites” immediately. This removes “index.php” from your URLs. Magento 1 probably had this enabled. Magento 2 needs it enabled too. If you launch without it, your URLs will have “/index.php/” in them, which breaks all your redirects.
Set your base URLs correctly. Both secure and unsecure. Double-check for trailing slashes. Magento is particular about whether your base URL ends with a slash or not. If your Magento 1 site uses https://yourstore.com/ (with trailing slash), your Magento 2 base URL should match exactly.
Configure your canonical tags properly. Magento 2 handles these better than Magento 1, but you still need to tell it what to do. Enable canonical tags for both products and categories. Make sure they point to the correct version of each page. If you have URL parameters for sorting or layered navigation, canonical tags prevent duplicate content issues.
Set up your robots.txt file now. Block the admin panel, customer account sections, checkout, and any URL parameters that shouldn’t be indexed. But make sure you’re not accidentally blocking anything that should be crawlable. We’ve seen robots.txt files that blocked the entire /media/ directory, which meant no product images got indexed.
Configure XML sitemap generation. Magento 2 can generate these automatically, but the default settings are often wrong. Go to Stores > Configuration > Catalog > XML Sitemap. Set reasonable change frequency and priority values. Don’t just leave everything as “daily” and “1.0” priority. That looks spammy to Google. Your homepage might be daily, but your product pages probably aren’t unless you’re updating them constantly.
Step 4: Migrate Your Data with the Official Tool
Here’s where the Magento Data Migration Tool comes in. This is Adobe’s official tool for moving data from Magento 1 to Magento 2. Install it according to their documentation. Configure the connection to both databases. Run the three migration modes in sequence: settings, data, then delta.
The tool handles most of your database migration. It moves products, categories, customers, orders, CMS pages. But it doesn’t handle everything perfectly from an SEO perspective. You need to verify several things after the data migration completes.
Check every product’s URL key. The migration tool usually preserves these, but not always. If a product’s URL key changes, that product’s URL changes, which means you need a redirect. Go through your high-traffic products first. Make sure their URL keys in Magento 2 match exactly what they were in Magento 1.
Verify your category structure and URLs. Categories are trickier than products because they have hierarchy. The tool should maintain your category tree, but check the actual URLs. If your category paths changed, every product assigned to those categories might have a different URL now.
Review all CMS pages. Your About page, your blog posts, your landing pages. The migration tool copies the content, but URL keys can sometimes shift. Check them manually.
Look at your meta titles and descriptions. These should carry over, but we’ve seen cases where they don’t. If you lose your optimized meta data, your click-through rates from search results will drop even if your rankings hold steady.
Check your image alt tags. Magento 2 handles images differently than Magento 1. Make sure your product images still have their alt text. This matters for image search and accessibility.
Step 5: Build and Test Your Redirect Map
This is the most important spreadsheet you’ll create during migration. It’s a complete map of old URLs to new URLs.
Start with your site crawl from earlier. That’s your list of old URLs. Now crawl your Magento 2 staging site. That’s your list of new URLs. Compare them. Any URL that changed needs a redirect.
The format is simple: old URL in column A, new URL in column B, redirect type (almost always 301) in column C. But getting the data right takes attention to detail. A single typo means a broken link. A missing redirect means lost traffic.
Focus on pages with actual traffic first. Use your Google Search Console data. If a page got zero clicks in the last year, it’s low priority. If it got 10,000 clicks, it’s high priority. Rank your redirect list by importance.
Include all your backlinked pages. Even if they don’t get much organic traffic, backlinks are valuable. You don’t want to waste the authority those links provide.
Don’t forget about parameters. If your Magento 1 URLs used parameters for sorting, filtering, or tracking, decide how to handle those. You might redirect them to the base URL. You might preserve the parameters if Magento 2 uses the same ones.
Once your redirect map is complete, implement it at the server level. Use your .htaccess file for Apache or your nginx config for nginx. Don’t use Magento’s built-in URL rewrites for bulk redirects. They add database queries and slow down your site. Server-level redirects are faster and more reliable.
Test a sample of redirects before launch. Pick twenty random URLs from your list. Visit them on your staging site. Make sure they redirect correctly. Check the status code with a browser extension or curl. You want clean 301 redirects, not redirect chains or 302s.
Step 6: Verify Structured Data Implementation
If your Magento 1 site uses structured data for products (and it should), you need to verify that Magento 2 implements it correctly.
Magento 2 has better native support for JSON-LD structured data than Magento 1. But it doesn’t automatically migrate your existing implementation. Check your product pages in the Magento 2 staging environment. View the source code and look for the JSON-LD script tags.
You want Product schema at minimum. This includes name, image, description, price, availability, and ideally reviews if you have them. If Magento 2 isn’t outputting this data correctly, you’ll need to fix it through configuration or a template override.
Test your structured data with Google’s Rich Results Test tool. Paste in URLs from your staging site. The tool will show you what structured data Google sees and whether it’s valid. Fix any errors before launch.
Your breadcrumbs should also use BreadcrumbList schema. Magento 2 usually handles this natively, but verify it. Breadcrumbs help Google understand your site structure and can appear in search results.
If you have an organization schema on your homepage or a local business schema, make sure that carries over too. These aren’t usually in Magento’s database, so they might not migrate automatically if they were hardcoded in your theme.
Step 7: Run Pre-Launch Technical Checks
You’re almost ready to launch. Before you do, run through these technical checks on your staging environment.
Page speed matters more now than it did when you built your Magento 1 site. Test your Magento 2 site with PageSpeed Insights, GTmetrix, or WebPageTest. You want fast Core Web Vitals. If your Largest Contentful Paint is over 2.5 seconds or your Cumulative Layout Shift is high, fix it before launch. Magento 2 can be faster than Magento 1, but only if it’s configured properly.
Check mobile rendering. Google uses mobile-first indexing now. Your site needs to work perfectly on mobile. Test on actual devices, not just browser dev tools. Look for layout issues, unreadable text, buttons that are too small to tap.
Verify your internal linking structure. Crawl the staging site and look at your link equity distribution. Do your important category pages get linked to from your homepage? Do your product pages link to related products? Are there orphan pages with no internal links? Fix these issues before launch, not after.
Make sure your XML sitemap generates correctly. Access it at /sitemap.xml and verify it includes all your important pages. Submit it to Google Search Console before launch so Google knows to crawl it immediately.
Check your hreflang tags if you have multiple language or regional versions of your store. Magento 2 handles this, but the configuration is different from Magento 1. Test that each version of your site references the other versions correctly.
Step 8: Execute Launch and Monitor Closely
When you’re ready to launch, timing matters. Don’t launch on a Friday afternoon. Launch on a Tuesday or Wednesday morning when your team is available to monitor and respond to issues.
Switch your DNS to point to the Magento 2 server. This takes time to propagate. Some users will hit the old site for a few hours while DNS updates. That’s normal.
Immediately after launch, start monitoring. Watch Google Search Console for crawl errors. You’ll probably see some. Fix them quickly. Check your server logs for 404 errors. These indicate missing redirects. Add them to your .htaccess file as you find them.
Monitor your organic traffic in Google Analytics. Don’t panic if it dips slightly in the first 48 hours. Google is re-crawling and re-evaluating your site. Small fluctuations are normal. But if traffic drops by 20% or more, you have a problem. Check your redirects. Make sure your XML sitemap is accessible. Verify that Google can actually crawl your new site.
Use the URL Inspection tool in Search Console to check how Google sees your new pages. Fetch a few important URLs and make sure Google can render them properly. If JavaScript is blocking content or if your page speed is terrible, you’ll see it here.
Keep an eye on your keyword rankings. Use whatever rank tracking tool you normally use. Check your top twenty keywords daily for the first week. If rankings drop significantly, investigate why. Usually it’s a technical issue like missing canonical tags or broken internal links.
Step 9: Maintain Active Post-Migration Monitoring
The migration isn’t over when the new site launches. The next thirty days are critical.
Keep your Google Search Console monitoring active. Watch for new crawl errors. Google will keep discovering pages and testing your redirects. Fix any issues immediately.
Check your backlinks. Some sites that linked to you might have broken link checkers. They might remove links that redirect. Reach out to important linking sites and let them know you migrated. Ask them to update their links to your new URLs. This prevents redirect chains and preserves link equity better.
Monitor your page speed continuously. Magento 2 can perform well, but it needs maintenance. Cache needs clearing, logs need rotating, database tables need optimizing. Set up automated monitoring so you know if performance degrades.
Review your content. Migration is a good time to identify thin or duplicate content. If you have category pages with identical descriptions, now’s the time to fix them. If you have old product pages that should be 301’d to current products, do it now.
After thirty days, do a full SEO audit of the new site. Crawl it again. Compare it to your pre-migration crawl. Look for differences. Any pages that didn’t migrate? Any new errors? Fix them.
Check your organic traffic trends. By thirty days, things should stabilize. If traffic is still down from pre-migration levels, dig into why. Look at which pages lost traffic. Are they redirected correctly? Do they have the same content? Are they still indexed?
What Successful Migrations Have in Common
Every migration teaches us something. Some patterns hold true across dozens of projects.
Redirects are where most migrations fail. Not because people don’t do them, but because they do them incompletely. Missing ten redirects out of a thousand seems like a 99% success rate until you realize two of those ten were your highest-traffic pages. Check everything.
Page speed on Magento 2 requires active management. Out of the box, Magento 2 is slower than Magento 1 for many stores. You need full-page caching configured properly. You need a CDN for your static assets. You need image optimization. Budget time for performance work, not just migration work.
Communication with your team matters more than technical skill. If your developer doesn’t understand why redirects matter, or why URL structure needs to match, or why they can’t just “make it look better” without considering SEO impact, you’ll have problems. Make sure everyone understands the goal: maintain continuity.
The stores that migrate successfully are the ones that treat it as a project, not a task. They allocate real time. They test thoroughly before launch. They monitor actively after launch. The ones that fail are the ones that rush it because “we’re already on an unsupported platform, we need to move fast.”
Your migration will probably surface SEO issues that existed in Magento 1 but were never addressed. Duplicate content. Thin pages. Broken internal links. Poor site structure. Don’t try to fix everything during migration. Fix the critical stuff, document the rest, tackle it after you’re stable on Magento 2.
Abschließende Gedanken
Migrating from Magento 1 to Magento 2 is not a simple transfer, but a full transformation. However, if done with intention and awareness, it becomes an opportunity to protect everything you’ve built and set your store up for future growth.
SEO doesn’t have to suffer. Your rankings don’t have to fall. And your visibility doesn’t need to reset.
You just need to respect the relationship between your old structure and your new one, rebuild your site with care, and treat Google’s expectations as part of the migration itself.
Magento 2 brings better speed, cleaner architecture, improved SEO tools, and a more scalable foundation. When you carry over your SEO properly, the platform gives you a chance not only to maintain your presence, but to expand it.
BrandCrock handles migrations like this on a daily basis. If you want help with yours, reach out to us. We’ll audit your current site, plan the migration properly, and make sure your rankings survive the move.